Your basket is currently empty!
Kiwi fruit – Chinese Gooseberry – How to Grow
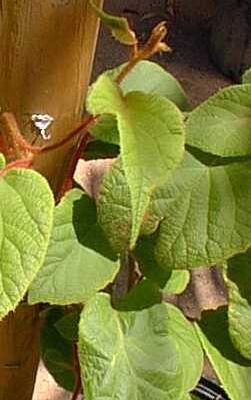
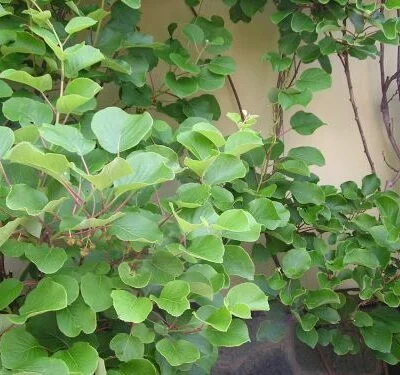
The Chinese Gooseberry vine. What a beautiful climbing vine this is, surely it would be cultivated anyway even without it’s delicious fruits. Growing kiwi vines isn’t that difficult with the right conditions, as you will discover by reading on. The bristly stems and leaves look as if they were fashioned from velvet, the elegant pointed heart shaped leaves are a rich green and the leaf stalks can be decidedly flushed with red, especially on young stems. The flowers are demure and white but have a very pleasing fragrance.
You can buy quality Kiwi and Chinese Gooseberry vinese here
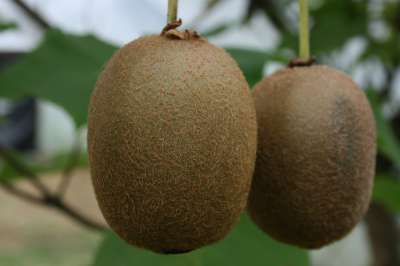
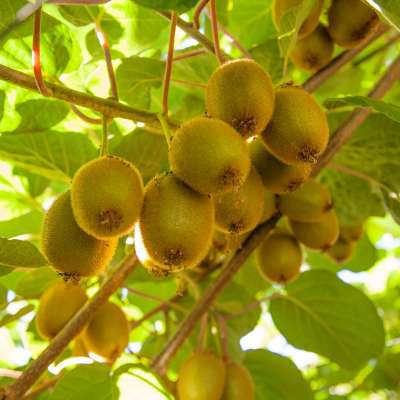
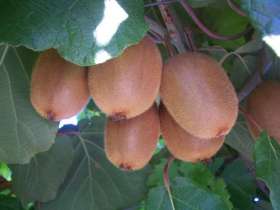
This fruit used to be known as Chinese Gooseberry because it came from Asia. Latterly it has been popularised by the term Kiwi fruit, because New Zealand Horticulturalists put a lot of work into breeding new hybrids and it became an important commercial crop there. It was formerly classified botanically as Actinidia chinensis but is now known as Actinidia deliciosa. Other species of Actinidia are popular garden ornamentals, especially the well known Actinidia Kolomikta which has painted leaves in pink and silver but seldom has worthwhile fruits. The egg shaped brown fuzzy fruits of the Chinese Gooseberry are very high in Vitamin C; although quite unattractive externally when sliced the inner flesh reveals a beautifully designed pattern within.
Kiwi Vine Care
The Kiwi Fruit [formerly more popularly known as Chinese Gooseberry] must have something to climb up as it’s thin twining stems curl readily around any available support but are unable to support themselves. They must have a full sun position so that the fruit ripens to it’s greatest capacity in the Autumn and the added sunshine also helps to ripen the wood so that is induced to flower. The soil must be well drained and commercially they are often planted on mounds of earth or even ridges like potato’s as of course this makes sure the roots never sit in water which is anathema to these plants. It is a practice that can equally be employed by the home gardener. The soil ph isn’t too important.
The site should ideally be free of late frosts although this isn’t of course always practical. But special attention should be given to them in the Spring when they leaf up as although the vines are quite hardy during the winter when dormant, they are highly susceptible to damage by late frosts when they are coming into leaf and this sets them back for the whole season. If the nights get cold at this time then be prepared to protect them with horticultural fleece especially if they are being grown in an open position rather than against a wall.
Over winter the vines can take minus 7 or 8 degree frosts, anything more than that and they can get damaged so if conditions turn very severe you can lag the main trunk and stems with fleece or a similar material. If you want to show your kiwi vines the most love you can do this as a precaution anyway at the start of the winter and this might be a good practice to employ anyway if you live in the North.The vines will of course do very well in a greenhouse or conservatory with very reliable crops. It should be remembered that inside the flowers will definitely need hand pollinating because there won’t be any insects to do the job for you.
Pollination & flowering
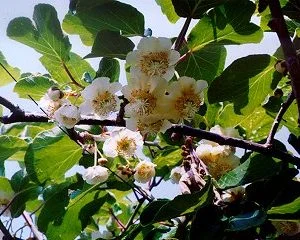
The flowers are white, cup or saucer shaped and open in early summer. They are delightfully scented and this no doubt attracts the bumblebee, honeybees and hover flies which pollinate them. They can also be pollinated to a smaller extent by the wind. Hand pollination can aid fruit set and also the quality of the fruit. The easiest way to do this is to take a handful of male flowers and brush them over the females one by one. The male flowers used for this purpose should be no more than 2/3 days old because after that they have no useful pollen [the male plant opens it’s flowers over an extended period to compensate for this] Female flowers are receptive to pollen for a week or more.
Planting Kiwi vines
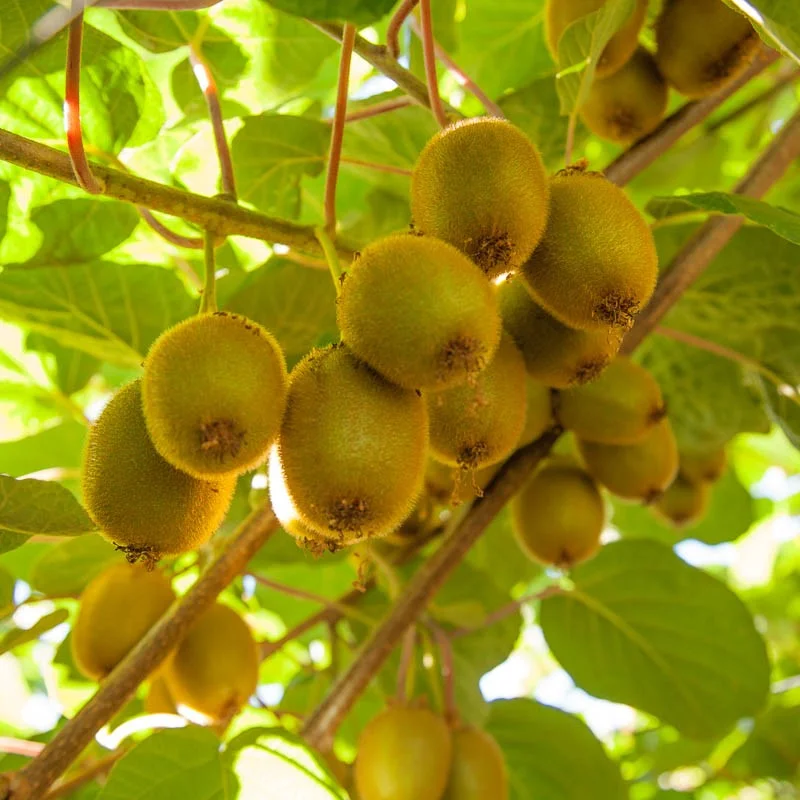
If you are at all unsure as to drainage then it is best to plant them on a raised heap of earth to ensure the roots never get too wet. The plant should be set a few inches away from it’s support and angled toward it. When the first shoots grow out they can be attached to the support. These plants are almost always supplied in containers so it is a simple matter to get the planting depth right as they should be at the same level with the top of the compost equal with the surrounding soil. Place a handful of blood fish and bone beneath the roots and work it into the soil itself so it isn’t actually in contact with the roots themselves. This is the fertilizer of choice with professional growers of these fruits and provides all the initial nutrients required of an establishing vine.
The vines can be planted out at any time of year but December and January are the worst months unless you have a particularly protected area or wish to plant in a greenhouse in which case it won’t matter. Vines planted during the growing season will require very regular watering for a few weeks following planting to make sure they establish well. They should produce a lot of growth fast so you need to ensure the plant has the resources to support this growth.
Additional feeding
Once the vines are established and growing well switch feeding to Nitrogen applied at 1oz per square metre. It is best to give Nitrogen when the soil is damp so water the ground before hand or wait until it has rained before applying. Nitrogen should be given twice, during the growing season.
Flowering
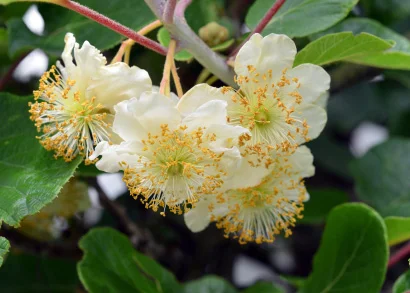
Kiwi plants produce separate male and female flowers. It is commonplace to plant one male for up to 6 or 8 females. The vines should be in fairly close proximity for the best results. All male varieties will pollinate all female varieties; although the female varieties can vary slightly in the times at which they flower, the males have quite an extended season and will almost always catch the females. Self fertilizing varieties are beginning to come onto the market, such as Solo, Soloissimo and Jenny. These are of value if you can only afford the space for one vine, but the greatest crop and best quality will come from growing in the traditional way with one male and female plants.
Pruning and training Kiwi fruit on an arch or pergola
For pergola or arch training the aim is to produce a strong single trunk with about 3 main branches near the top of the vine. In the early stages make sure the vine grows only with one shoot, which is normally the case anyway but lower side laterals should be rubbed out if they form. At this point it is better by the way to tie the main shoot to it’s support rather than let it twine around naturally; this will result in a stronger main stem which will be better able to support itself. Vines that have twined around often end up slumping and sliding down the post as the weight of the plant brings it down; such vines are very difficult thereafter to keep upright because it will keep on happening. When the main shoot has reached the top of it’s main supporting post pinch it out and then keep up to 3 or 4 main shoots which will appear just below this, to train along the top wires. These will carry the yield, not the main central stem. The first crops form on these arms, in subsequent years the crop is formed on side laterals that form on these arms. These side laterals are carefully tied in – take care because they are brittle. Fruit is borne on new growth that appears from wood that is 1 year old. Generally the vines will produce much more growth than you need because Kiwi fruit are vigorous growers. A certain amount of excess growth should be pruned out completely, as excessive shade will limit the production of fruit and it won’t ripen so well, additionally if the vine is congested the bees will not be able to fulfil their pollination duties so well. So just keep some new laterals on the main framework which will be left to ripen and produce new flower bearing shoots the next season.
Espalier training for a wall
If you have a sunny south or west facing wall you can devote to your kiwi fruits then they will love you for it. You will need 8-10’ for each vine.
Space wires at intervals of around 24”; three or four would be normal depending on how many ‘tiers’ you want to train. Immediately after planting shorten the leader to the top of the first wire. During the course of the fist growing season a new leader will form, along with several side shoots lower down. When it has grown tie in the new leader to a well positioned bamboo cane inserted vertically by the main stem. Select two side shoots that are suitably positioned to train along the first wires. They are fairly supple so they don’t have to be exactly in position and can be tied up or down depending on position. The tips of these can be pinched out when they reach 90-120cm’s. This will encourage side shoots that will produce the fruit the next season. These side laterals will continue to grow and should be tied in until they have filled the allotted space at which point they should be stopped.
Repeat for tiers two and three; pinch side shoots back to four or five leaves during the summer for fruit production the following year. When vines are fully established it may be necessary to prune in winter and summer to keep growth under control.
Although Kiwi fruits like good drainage ensure the soil isn’t too dry which can sometimes be the case in these situations.
Post and wire support system
If you do not have a pergola or arch, or a sunny wall but you do have a sheltered spot where you want to grow kiwi fruit and want to erect a support system especially, then the best way to do this is to emulate the ‘T’ post system utilized by commercial growers. Sink one main post into the ground with a horizontal one nailed to the top of the post forming a ‘T’ of about 1.8 metres in height. Do the same at the other end of the row. From the top bar 3 straining wires are affixed one each end. Allow 8-10’ between plants. Train the vines up each post and then allow the laterals to go along the straining wires; the fruit will hang obligingly underneath.
Thinning the fruit
If you are in the enviable position of having an excessive crop of Chinese gooseberries then you may want to think about thinning the crop to maintain fruit size and this can also discourage biennial fruiting which can sometimes follow years of plenty. You can remove up to a third of the fruit after it has set.
Irrigation
Additional watering is beneficial soon after fruit set, when the fruit is rapidly increasing in size this extra water will be put to best use so aim to water at the roots for about 40 days after blossom set. Take care to make sure the roots aren’t sitting in water as they may quickly rot under such conditions.
Harvesting & storing the fruit
The fruit should be left on the vine as long as possible because it won’t ripen naturally in this country unless we have a warm and prolonged autumn. The way to get around this is to leave the fruit until just before signifcant frosts are forecast [a light frost will do no harm] and then pick the fruit.
Having successfully achieved a good crop from your vines attention should be given to keeping it in good condition. As the fruits won’t be fully ripe when you harvest them the best course of action for small numbers is to ripen them on a sunny windowsill. A practiced hand can tell when the fruit is ripe as it ‘gives’ slightly under gentle pressure from thumb and forefinger.
Larger numbers of fruit can be stored ideally in a refrigerator and brought out onto a sunny windowsill for ripening, a few at a time. The fruits can also be kept in single layers, in trays in a cool garage or outhouse.The fruit withstands low temperatures of just above freezing for optimum storage.
Bugs & diseases
These fruits are troubled little by pests in this country.Leaf rolling caterpillars can sometimes be a pest you wille cnounter but are quite easily controlled with an application of Provado and are not in any case considered a serious pest.The greatest problem we have on the Nursery comes with young plants which seem to be very attractive to slugs and snails. It is wise to provide some slug bait or a slug trap nearby, although vines grown on sunny walls tend to escape this type of damage because the conditions are unsuitable for our slimy enemies.The vines can be susceptible to necrosis or discoloration. This is usually due to a short of nitrogen or potash both of which are easily applied so if the leaves start to yellow or brown around the edged then you know what do to.
Phytophthora Root Rot
This disease will remain undected until your Vine wilts as though short of water but no amount of irrigation brings it around and the plant dies. There is no cure except to re-plant in a different area but thankfully this isn’t a problem you are likely to encounter unless you are unlucky.Honey fungus has also been found to attack Kiwi fruits so if you have had this disease on trees in your garden it would be wise to steer clear of the Chinese Gooseberry.
Varieties of Chinese Gooseberry
There is a small but acceptable range of varieties from which to choose of which Atlas, Hayward and Bruno are by far the most commonly grown and satisfactory.
Abbot
Thought to be synonymous with the variety ‘Allison’ This is an early flowering variety that yields well, medium sized fruits with quite long hairs.
Bruno
Early to mid season flowering; fruit quite large and cylindrical and quite a dark brown so unlikely to be confused with other varieties. Heavy yielding, a very good female variety.
Monty
Flowers later than most, a very prolific variety which can require thinning to maintain fruit size or they may be small. Oblong, slightly tapering fruits.
Hayward
Large, broadly oval hairy fruits, good flavour. They skin is pale golden brown with fine silky hairs. The yield may not compare to others but the quality of the fruits and the taste are with precedent. Very late flowering but still usually pollinated by Atlas without any problem.
Brodie
Selected as a superior new variety to replace Hayward, this vigorous grower flowers abundantly and has the potential for heavy crops. It would not appear to be available in the UK as yet.
Matua
A good partner to Hayward but in other respects the least satisfactory of the male varieties.
Atlas
The best Male, pollinates well with all varieties, vigorously growing and hardy.
I hope this article has inspired you to try these decorative and rewarding fruiting vines.


