Your basket is currently empty!
People often ask, how do you grow Blackberries…..
- Plant pot grown plants at any time of year
- Space 6-8′ apart, more for vigorous varieties
- Sun or part shade is suitable
- Soil – any good reasonably drained soil; avoid waterlogged conditions
- Daily watering essential if planted Spring-Summer
- Feed at planting with bonemeal; topdress annually.
- Most varieties need support with post/wires, or grow against a wall or over a hedge or outbuilding.
Usually they are trained up post and wire support systems because the growth is too lac to support itself. This keeps the developing fruits clean and allos them to get more sun. Some more compact bushy varieties have beenj develkoped that can be grown free standing. Most soil types are fine for blackberries as long as drainage is good, and they do appreciate some sun.
Blackberries thrive on better soil so some attention before planting goes a long way to ensuring good crops of quality fruit. If soil is thin or dry improve it with a heavy application of compost or manure and remember that the plants will need more watering initially to get them going. Attention should be paid over the ensuing months of the first growing season to make sure the plants’ haven’t become stressed.
At the other end of the spectrum heavy soils are suitable but growth will be better if drainage is alleviated with fine grit or sharp sand on planting.
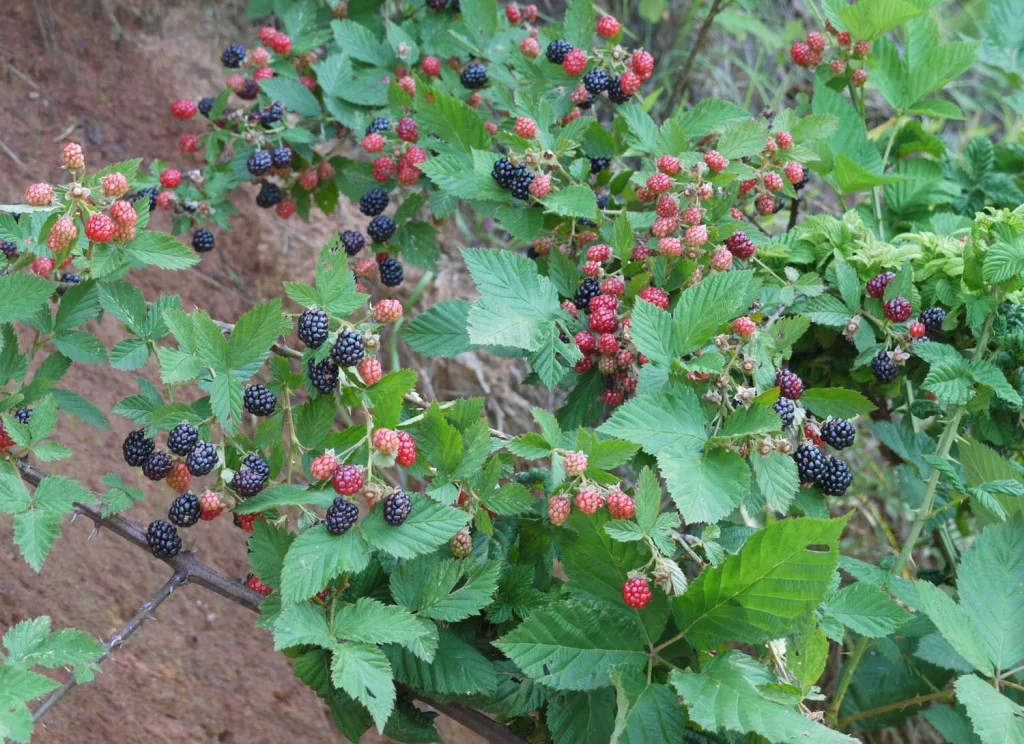
Ground preparation is better if it has taken place in advance to allow the new soil to ‘break’ down and it also makes it possible to remove further weed growth which does tend to appear wherever the soil has been turned. Apply Growmore or Bonemeal as a feed, about 3oz’s to each planting hole and rake or incorporate it into the soil thoroughly. If using posts and wires then these should be erected now using tanolised timber posts of not less than 7’ in length [allowing for 2’ in the ground] and three galvanized steel or rubber straining wires, the first at about 24” and the second and third at 12” intervals above it. It is also possible to simply insert one pole per plant and keep the plants tied into that which is simpler but allows for less growth to be kept and therefore yields will be less.
Your new plants will likely be supplied in containers so remove that container and if the roots are at all congested tease them out a little gently. Set into the ground so at the same depth with the uppermost roots just level or ever so slightly below the soil surface. Firm down very well with the heal of your shoe or boot, to ensure close contact with the roots and the soil. Puddle well in, watering heavily until water sits on the soil for a few seconds before sinking in. If planted during the growing period water twice a day for the first two weeks or so until established, thereafter once a day until the plant is really going well. Try to avoid watering in during the main part of the day because at this time of year so much of it is wasted through evaporation. It is always better to water when it is cool if at all possible.
If you are planting during the dormant period [Autumn & Winter] it is only necessary to water in the once, I like to do this to settle the soil round the roots.
Remember if you are planting against a fence or wall that these area’s can be very dry as they tend to be sheltered from prevailing wind and rain. Make allowances for this after planting and give special attention to watering – remember you really want to puddle it in, dispense with the rose and the watering can and use a hose pipe if at all possible!
Supporting Blackberry plants
For traditional post and wire support systems the following planting distances apply:
- For Waldo and Loch Ness – 4’
- For Merton Thornless, Helen, Obsidian, Loch Tay, Merton Thornless and similar growing varieties – 6-8’
- For Oregon Thornless, Ashton Cross, Adrienne, Thornfree etc – 8-10’
- Himalayan Giant, John Innes, Bedford Giant – 10’ +
When should I plant Blackberries?
There isn’t really a ‘best time’ to plant Blackberries unlike other soft fruit plants and they seem to do well whenever they are planted. Occasionally you will be sold ‘bare root’ plants and these should only be planted out whilst they are dormant, from October to April. But the greatest majority of Blackberries are sold in pots so it is possible to re plant them whenever you wish including when in growth, so as long as you are going to be around and have the commitment to water them well afterward it is perfectly ok to plant during the Spring and Summer and the plants certainly seem to grow away quickly afterward
.Pot grown plants can similarly be planted at any time during the winter and there isn’t any requirement to water regularly afterwards if you plant them then. The only time you need to avoid is when snow is on the ground or frosty weather is so severe you cannot prepare the ground. Once in the ground the plants are quite hardy and unlikely to be affected by adverse weather. And if they have been supplied in pots you can always keep them until conditions are better to plant. Place them in a sheltered part of the garden and, if spring approaches keep a check to make sure they aren’t getting dry.
Pruning Blackberries, and training
As mentioned previously excepting the one or two compact types now available, some support is necessary. Blackberries are grown on a biennial support system, that is to say the new growths are tied in to the supports, allowed to crop the next year and then cut out completely to allow for the new growths to be tied in and continue the process. It is simplest to train the new shoots – which can be very strong and vigorous – along wires stretched out either side of the plant. But you can also opt for a ‘fan’ system by inserting wires from pegs in the ground radiating from the base of the plant and tied to a top rail until you have the ‘fan’ shape which can be most attractive and allows for about 5’ main shoots to be utilized each year and replaced on an annual system.
The first full year following planting 2 or more new shoots should emerge from the base and as they lengthen they should be tied in to the support system. At this point if there is an old cane left [present when you received the plant] it should be removed as it will not grow strongly again. When these canes have fruited the next season cut them down to ground level. By now there will be new shoots coming through to take there place and these should be tied in as before.
From the third year onward you must remember to get rid of the old fruited canes at the end of each growing season, to allow the new growths to come through without competition otherwise you will end up with an out of control blackberry with a lot of dead and unproductive wood. Woody growth that has already fruited may bear a crop of some sort for a second season but it will not be as productive as strong new ripened shoots. If for some reason your blackberry plant has lost some vigour and you can not see many new shoots coming through then it is possible to leave one or more of these 2 year old shoots to augment the next years crop, in the meantime you can take action to rejuvenate the plant with feeding so as to renew basal growth vigour which is always preferred.
Feeding & watering established plants
Growmore or bone-meal are good general purpose feeds and should be applied at a rate of 2oz’s to each plant, in late February or early March just before the plants begin active growth again.
Additional irrigation is always beneficial during dry spells, it will increase not only the yield but also the size of the fruits. But try to water the ground itself, not the foliage as this can encourage fungal diseases. Puddle the ground around the plants with a hose; this should be done in the early morning or the cool of the evening for preference.
An additional worthwhile practice is that of mulching; any organic rich material such as leafmould, peat or coir compost, bark chippings or sawdust will do, spread thickly to a depth of 2 inches around the plant itself. This has the dual benefits of conserving moisture and reducing weed growth.
Seedling growth
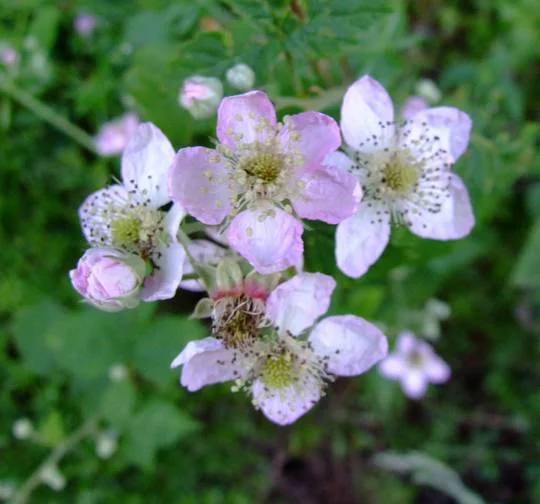
Keep a look out for blackberry seedlings which will appear from time to time, sometimes they emerge in thick stands where unused fruit has fallen and the resultant seeds have germinated in a group. Don’t be tempted to leave them and don’t be fooled into thinking they might be useful, unless you have other area’s you want to populate with blackberry plants of unknown quality. It is very unlikely the resultant fruit will be of comparable quality and it may be unworthily. Additionally, all these plants will be thorny, even if the fruit is from a thorn free cultivar. Oregon Thornless is a bad culprit for producing a wealth of thorny seedlings, although they still have the identikit ‘parsley’ leaves of the type. Leave these seedlings to their own devices and in a year or two you will have a bramble jungle that can be difficult to get rid of so best practice is to unceremoniously get rid of any blackberry seedlings as soon as they are seen and as young as possible.
Growing Blackberries in pots & containers
This is perfectly possible using more restrained varieties such as Waldo and Loch Ness. Use a container not less than 20″ and a good peat based compost or a loam based compost – either suits equally well. You can plant at any time of year since Blackberries will usually be sold to you in pots anyway. Make sure to water regularly each day until the plant is established, and thereafter at least 3 times a week during the growing season. You can feed the developing plant with seaweed extract or tomato food. The first fruits usually develop on strong new growths produced the season before. The best varieties to grow in pots are Waldo Blackberries Bush and Loch Ness Blackberries Bush.


